Author Archives: randy

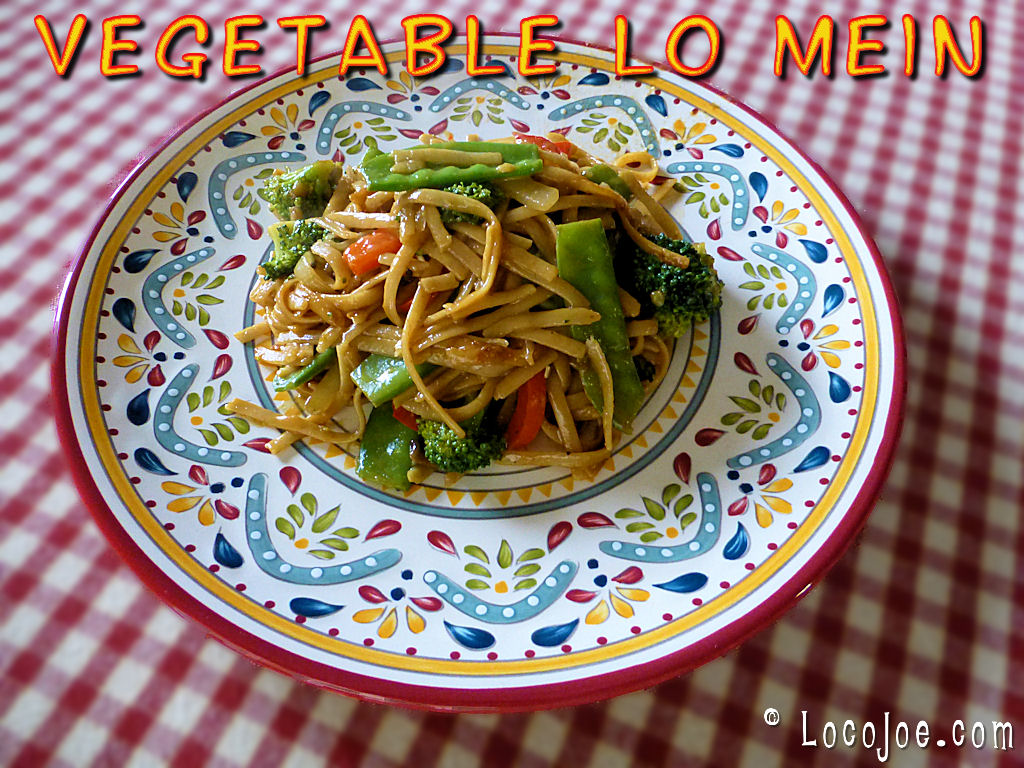
Vegetable Lo Mein

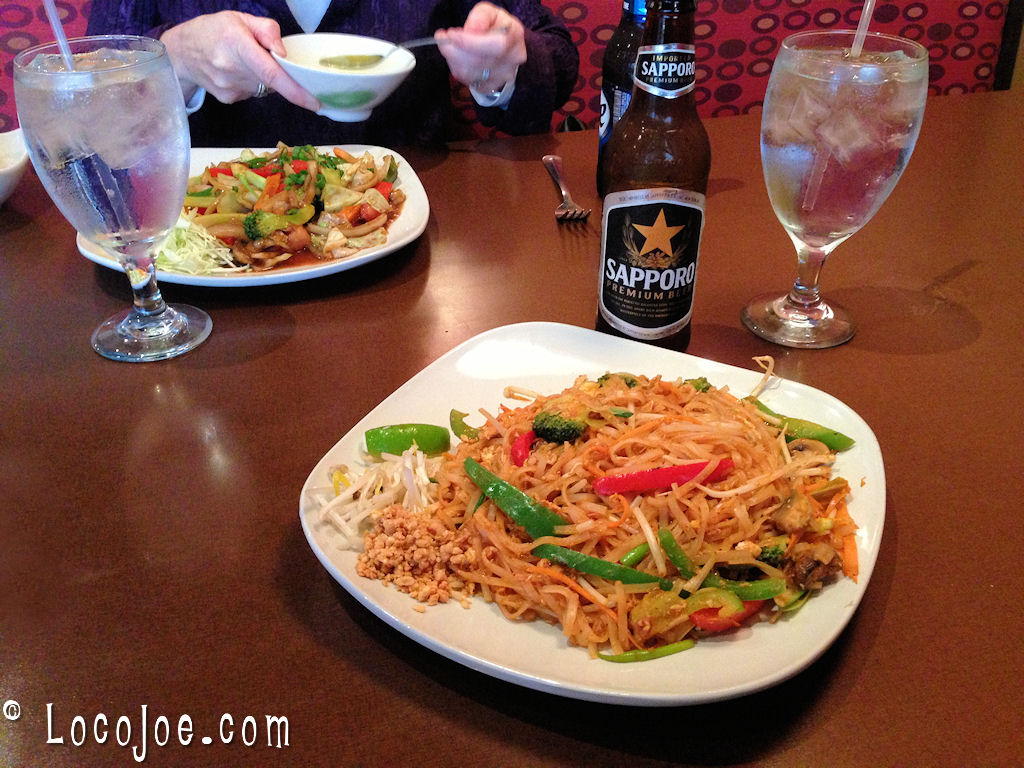
I made Lo Mein using wheat linguini noodles that were left over from the Linguini Alfredo and whatever veggies we had on hand. I attempted to brown the noodles in a skillet sprayed with olive oil and a little vegetable broth. Meanwhile stir frying the vegetables in a wok. I made and added the sauce below per the instructions. Then stir fried for a couple minutes and then add the noodles to the wok and stir fried a couple minutes more. We didn’t have Hoisin sauce so I made my own using the recipe at bottom.

Notes: It was really good but a little too saucy/oily. If I make again I’ll add less sauce.

Stir Fry Sauce
Ingredients:
1 tablespoon cornstarch
1 cup chicken broth
1/4 cup hoisin sauce
2 tablespoons agave nectar
1 tablespoon soy sauce
1/4 teaspoon groundginger
1/4 teaspoon cayenne pepper
1/4 teaspoon curry powder

Directions:
Mix cornstarch and chicken broth in a small bowl and add to stir fry. Stir in hoisin sauce, honey, soy sauce, ginger, cayenne pepper and curry powder. Cook and stir until thickened and bubbly.

Hoisin Sauce
Ingredients:
4 tablespoons soy sauce
2 tablespoons peanut butter
1 tablespoon molasses or 1 tablespoon honey
2 teaspoons seasoned rice vinegar
1 garlic clove, finely minced
2 teaspoons sesame seed oil
1 teaspoon chinese hot sauce (more or less to taste)
1/8 teaspoon black pepper

Directions:
Combine all ingredients in a small mixing bowl.
Mix with a whisk until well blended.

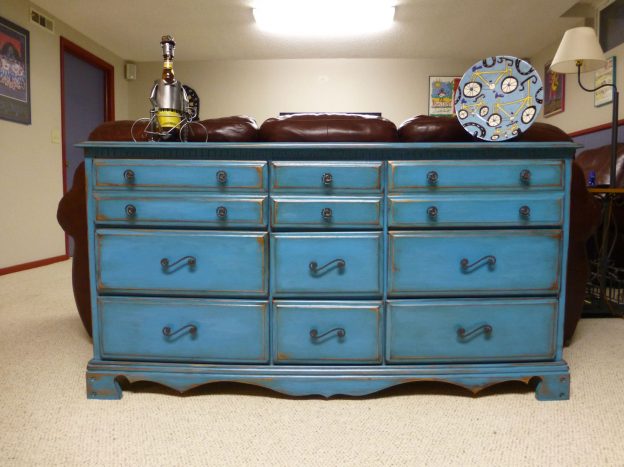
Dresser To Sofa Cabinet Re-do

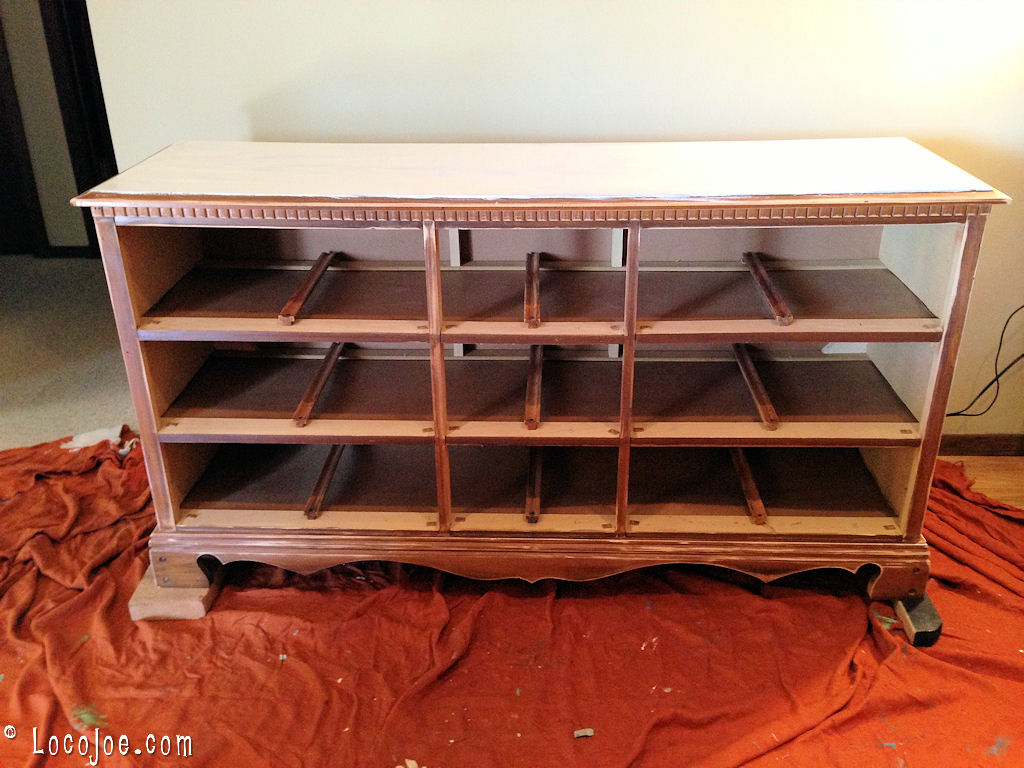
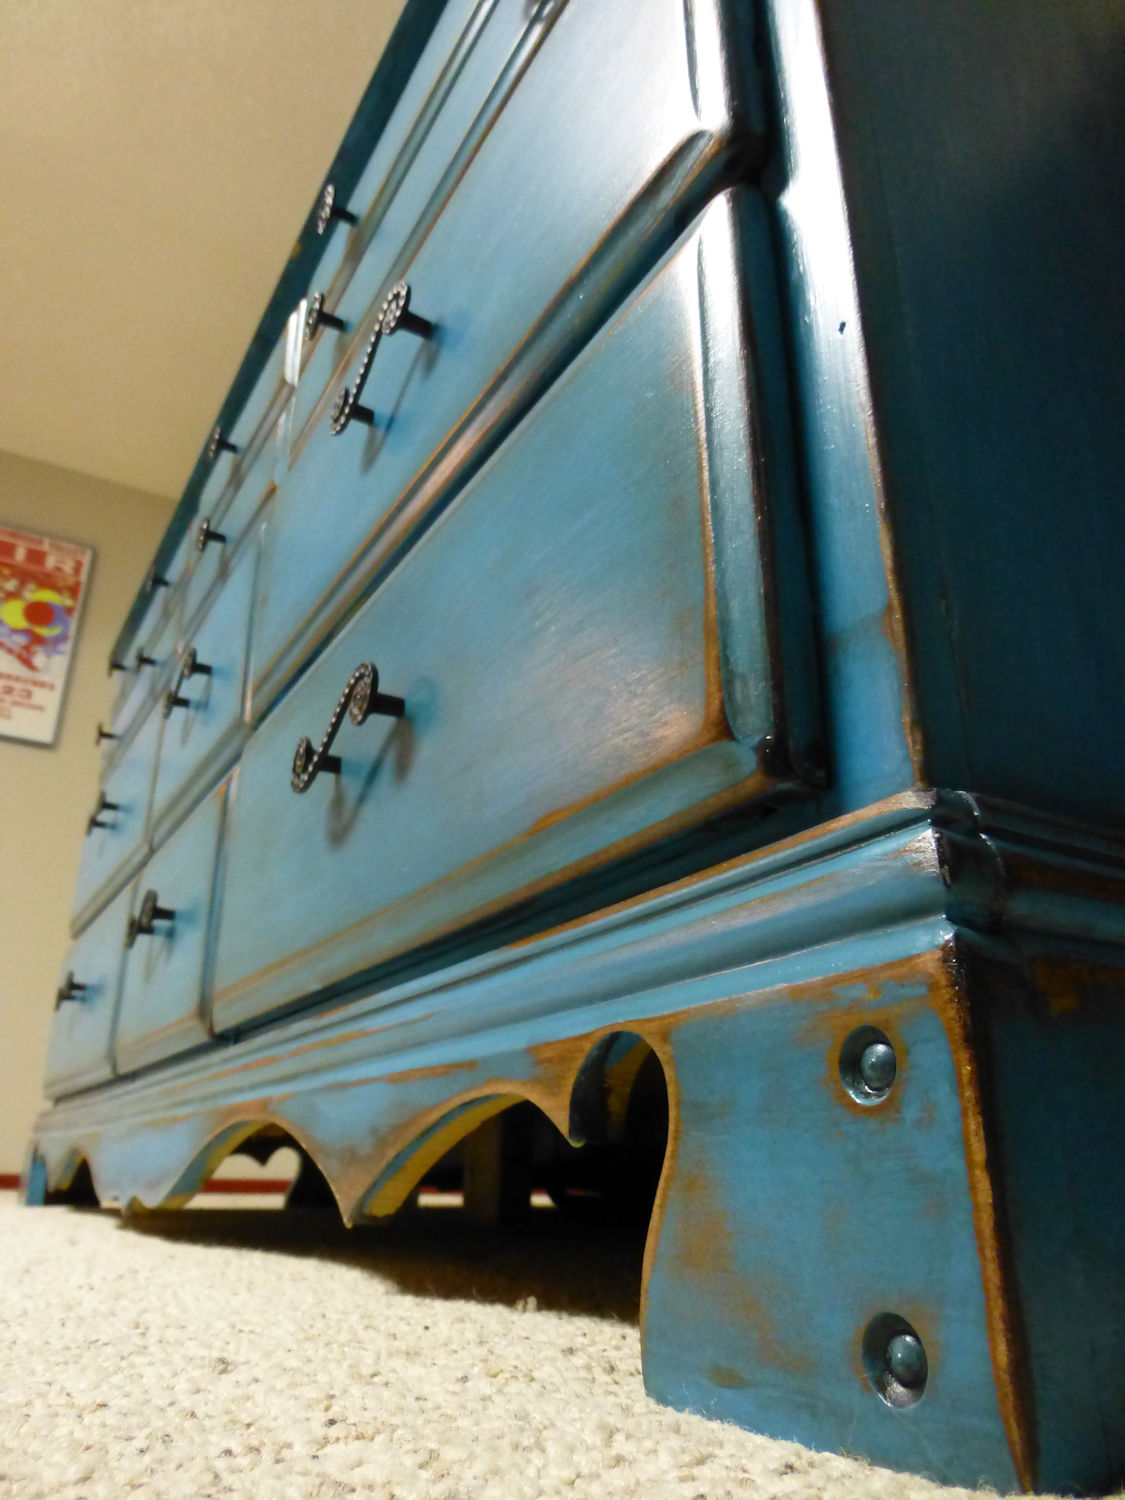
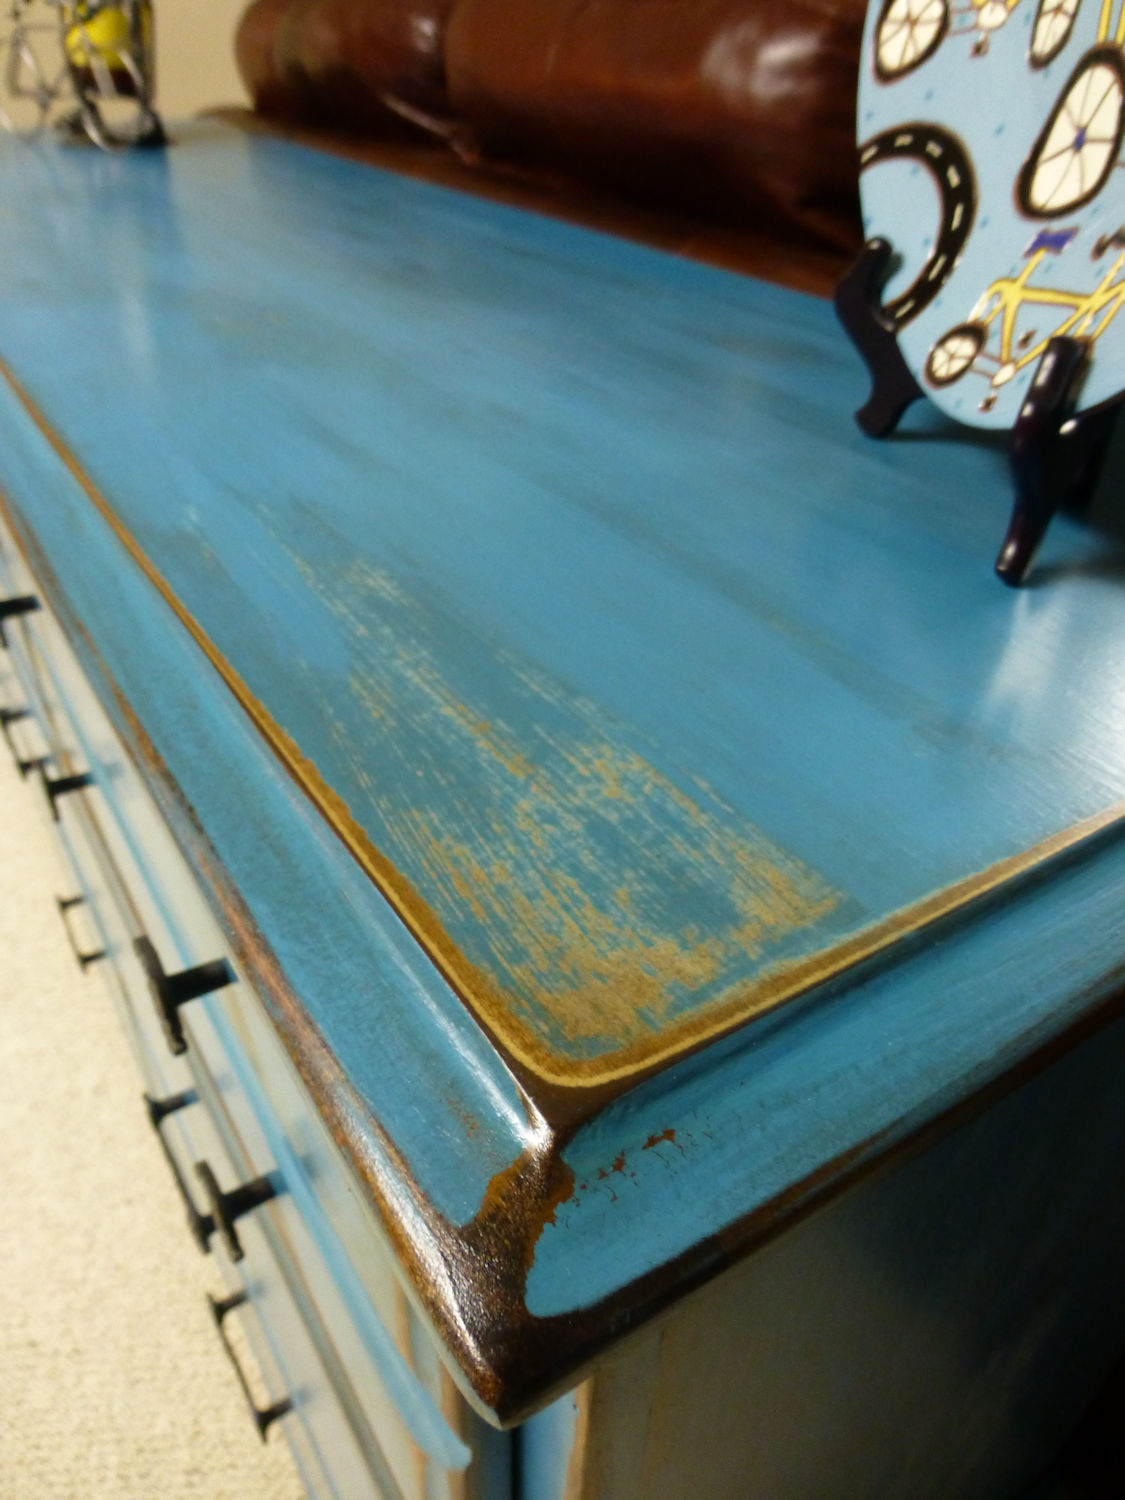
We’d been looking for a piece of furniture to put behind our Sofa in the “big room” in the basement to replace a folding table and chairs. The folding table was was used frequently for crafts, puzzles etc… but looked tacky. Our original intent was to replace it with some other type of table even if it required me making something. Then we had the opportunity to get this old dresser for free so we nixed the plan for the table and decided to go with the dresser.

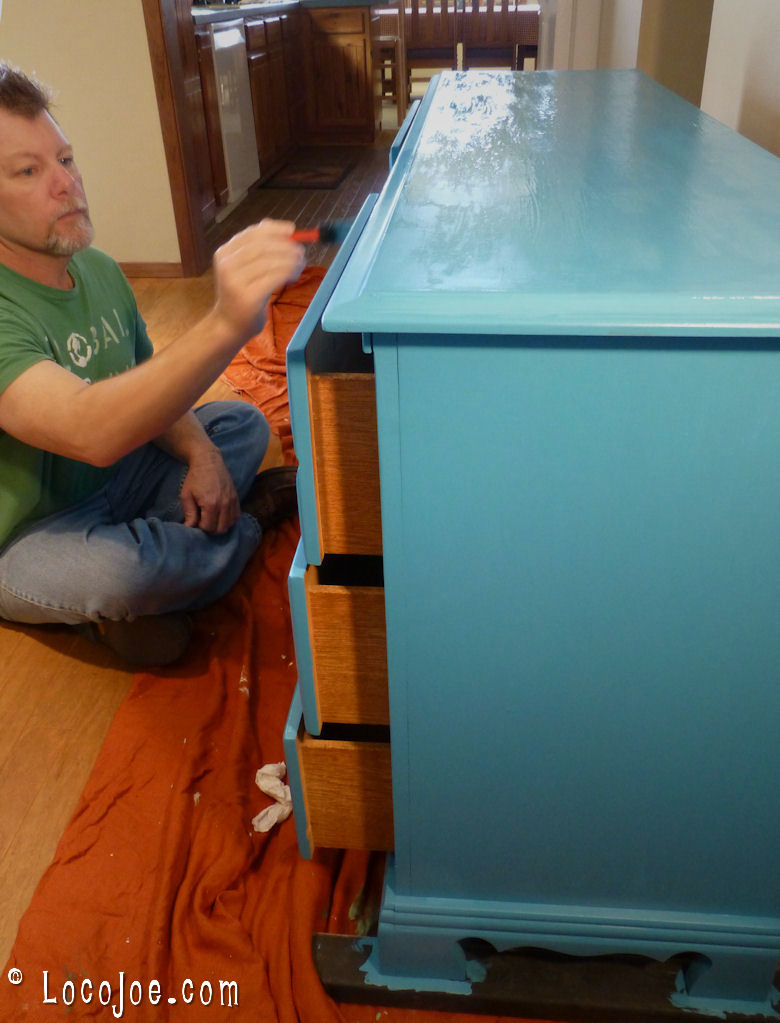
We wanted to give it a distressed paint look so I started by sanding off the finish and in some places through the finish and stain to the bare wood. I then primed the top and sides which were some kind of veneer. Next I applied an Olympic paint in the color of “Safe Harbor”. Once the paint dried I sanded it again, heavily on the edges and down to the bare wood. I started to go over it with a chocolate glaze but got impatient waiting for the glaze to dry/soak in so I switched to a Minwax mahogany stain and covered the entire dresser. I let the stain sit longer on the bare wood than I did the painted areas before wiping it off. For a clear coat I applied a couple coats of Minwax water based Polycrylic.

The finishing touch was new knobs and pulls.

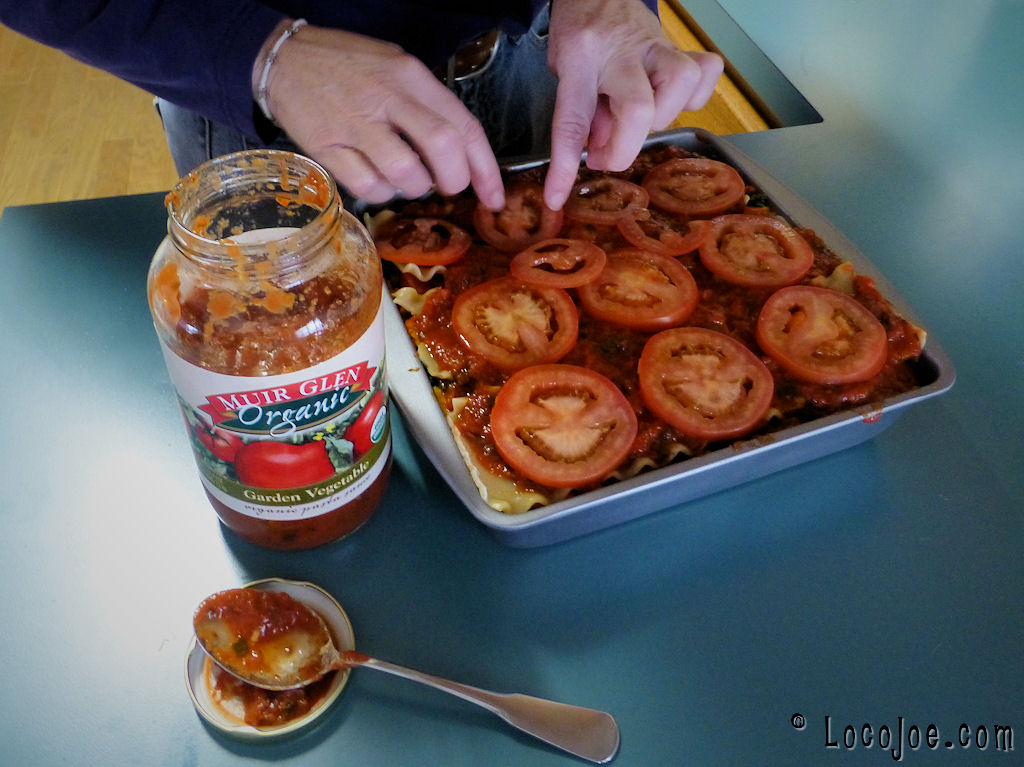
Raise-The-Roof Sweet Potato Vegetable Lasagna

Our Notes: I thought this was really good. Nova didn’t care for it. She doesn’t like the canned spinach. We cut the recipe (approx) in half.

Recipe Notes: If you’re starting this from scratch, begin by baking two sweet potatoes and start layering the lasagna once they’re done. If you sauce dry noodles, generously when layering the lasagna, it’s not necessary to boil the pasta. Use a sauce with little or no added oil (Muri Glen’s Mushroom Marinara or Portobello Marinara; whole foods brand 365 roasted red pepper, light Ragu tomato basil, Trader Joe’s organic spaghetti with mushrooms).
Adapted from “The Engine 2 Diet”.
Number of Servings: 12.

Ingredients:
1 onion chopped
1 small head garlic, cloves chopped
8 ounces mushrooms, sliced
1 head broccoli, chopeed
2 carrots, chopped
2 red bell peppers, seeded and chopped
1 pound silken tofu
1/2 tsp cayenne pepper
1 tsp dried oregano
1 teaspoon dried basil
1 teaspoon dried rosemary
2 jars (about 25 ounces each) prepared pasta sauce
1 pound whole grain lasagna noodles (uncooked)
1 pound frozen spinach, thawed and drained
2 sweet potatoes, cooked and mashed
6 roma tomatoes, thinly sliced
1 cup raw cashews, ground

Directions:
1. Set the oven at 400 degrees, Have on hand a 9×13 inch baking dish.
2. In a large skillet over high heat, cook the onion and garlic, stirring constantly, for 3 minutes. Add the mushrooms and cook, stirring often, for 5 minutes or until they release their liquid.
3. With a slotted spoon, transfer the vegetables to a large bowl, reserving the liquid in the pan.
4. In the same skillet, cook the broccoli and carrots, stirring often, for 5 minutes. Ad them to the mushroom mixture
5. Add the bell peppers to the pan and cook, stirring often, for 5 minutes or until they soften; transfer to the bowl of vegetables.
6. Drain the tofu by wrapping it in paper towels. Break it into pieces. Add the tofu to the vegetables with the cayenne, oregano, basil and rosemary. Mix well.
7. Cover the bottom of the baking dish with a layer of sauce. Add a layer of noodles. Cover the noodles generously with sauce. Spread all the vegetables on top. Add another layer of noodles, then another layer of sauce.
8. Distribute all the spinach evenly on top. Use all the sweet potatoes to make another layer. Add sauce, then noodles, and finally more sauce. Lay the tomatoes on top.
9. Cover with foil and bake for 45 minutes.
10. Remove the foil. Sprinkle with cashews and return to the oven. Continue to bake for 15 minutes. (total baking time 1 hour). Let rest 15 minutes before serving.

Source:: Sparkrecipes

Mexican Stuffed Peppers

Notes:

Ingredients:
2 whole green bell pepper, seeded and diced
¾ cup frozen corn, thawed
¾ cup black beans, drained and rinsed
¼ cup cornmeal
1 tbsp chili powder
1 tsp onion flakes
½ tsp cumin
¾ cup salsa

Directions:
Preheat oven to 375F. Cut peppers into boats and clean out insides. Heat all other ingredients plus 1/2 cup water over med-high heat, until thicker and bubbling, about 3 minutes. Place peppers in an oven dish and spoon mixture into peppers. Cover with foil and bake 20 minutes or until peppers are tender.

Source: The Happy Herbivore Cookbook

Linguine and Creamy Alfredo Sauce

Notes: We both liked this. I used a little less nutritional least. We served it along side spinach and artichoke hearts.

Ingredients:
1 package Silken Lite firm tofu
2 cups unsweetened soy milk
¼ cup nutritional yeast flakes
¼ cup raw cashews
1 tablespoon onion powder
½ teaspoon garlic powder
¾ teaspoon sea salt
½ teaspoon white pepper
1 white onion, diced
1 tablespoon fresh parsley, chopped
1 tablespoon fresh thyme, chopped
1 tablespoon fresh basil, chopped
¼ cup water
¼ cup white cooking wine
¼ cup whole wheat flour
16 ounces whole grain linguine, cooked

Directions:
Blend all the ingredients from the tofu to the pepper until smooth. Sauté the onion with the herbs and water in a saucepan over medium heat until translucent and all the liquid has evaporated. Be careful not to brown the onion during this step”

Pour in the wine, swirling it around in the pan to absorb the heat until it begins to sizzle. Add the blended ingredients to the wine and onions, continuously whisking the sauce.
When a gentle bubbling starts, gradually add the flour and continue to whisk until the sauce has thickened. Remove from heat. The sauce will be frothy at this point. Continue whisking for 1 minute, or until the sauce has settled and is smooth and thick. Ladle over the pasta.
Variation:
Add artichoke hearts and mushrooms to the sauce.

Source: The Engine 2 Diet book

Vegan Omelette

Notes: We both thought this was pretty good. I think it will be even better once I perfect cooking it. The first one stuck to the pan and the second one didn’t cook long enough. We made them sans the mushrooms and spinach and added vegan cheddar cheese.

Ingredients:
Omelet Filling
8 ounces mushrooms, sliced
½ onion, diced
1 red bell pepper, sliced into strips
1 cup baby spinach leaves

Omelet
12 ounces Silken Lite Firm tofu
2 tablespoons soy milk
2 tablespoons nutritional yeast
2 tablespoons Ener-G egg replacer
2 teaspoons Bragg Liquid Aminos
1 tablespoon vital wheat gluten
¼ teaspoon onion powder
¼ teaspoon turmeric
Salsa to taste (see page 240)
Fresh fruit

Directions:
For Omelet Filling:
Sauté the mushrooms and onion in a large, sprayed skillet over high heat for 5–7 minutes or until the mushroom liquid is mostly gone. Remove to a bowl and return the skillet to the heat. Toss the bell pepper strips in skillet for 3 minutes until they begin to brown slightly. Remove from heat and set aside.
For Omelet:
Blend together all ingredients until smooth. Spray a large nonstick skillet and pour half of the batter into the center, using a spoon to spread it out thinly over the bottom of the skillet. Turn the heat to medium. Cover and cook for 8 minutes, then place half of the cooked mushrooms, onions, bell pepper strips, and spinach in a line down the center of the omelet. Use a spatula to flip both sides over the veggies, cover and cook an additional 2 minutes. Remove from heat and gently shake the skillet from side to side a couple of times to loosen the omelet. Carefully slide the omelet onto a plate. Repeat with the second half of the batter. Serve immediately with salsa and a side of fresh fruit.

Source: unknown.

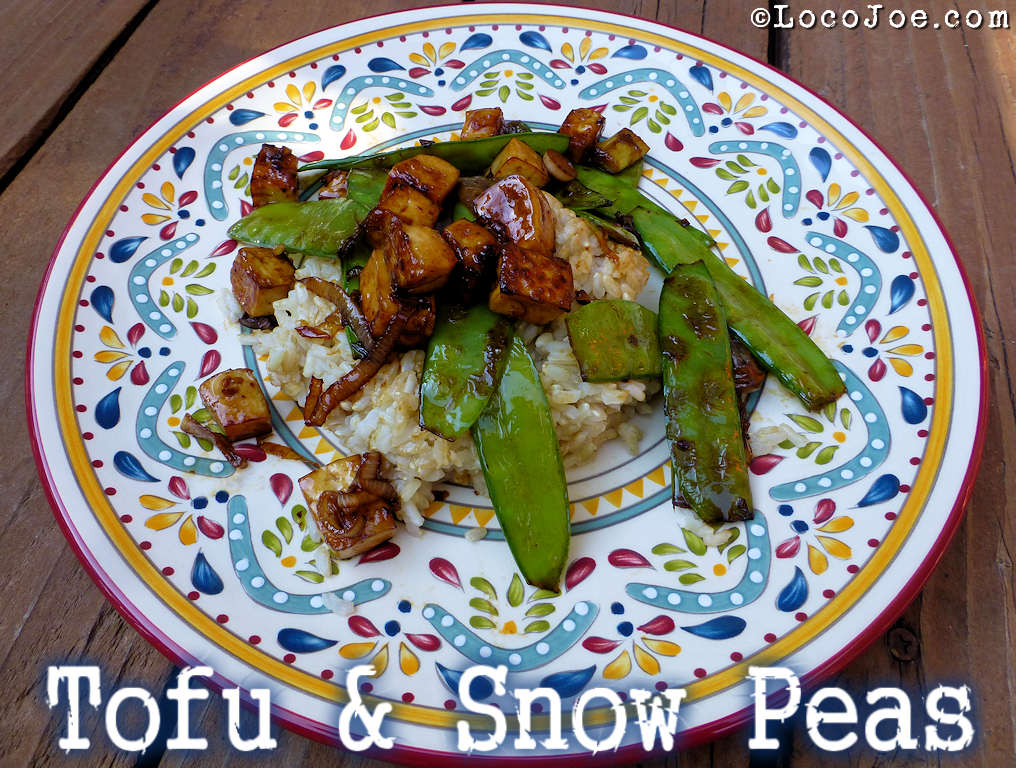
Broiled Tofu And Snow Peas

Notes: We both really like this. Serves 2.

Ingredients:
12 ounce package of firm tofu, drained
2 teaspoons soy sauce
1 1/2 teaspoons agave nectar
1/2 teaspoon sesame oil
2 cups snow peas
1 scallion, thinly sliced
1/2 tablespoon chile oil
1 cup cooked white or brown rice, for serving

Directions:
Heat broiler, with rack in top position. Cut tofu into cubes. Coat cubes with Braggs liquid aminos. Broil for 20 minutes turning cubes after 10.
In a small bowl stir together soy sauce, agave nectar, and sesame oil.
Heat wok on high with chile oil. Stir in snow peas and scallion and cook for a couple of minutes. Add liquid mixture and cook for a couple more minutes. Then add broiled tofu and cook for a couple more minutes.

Source:

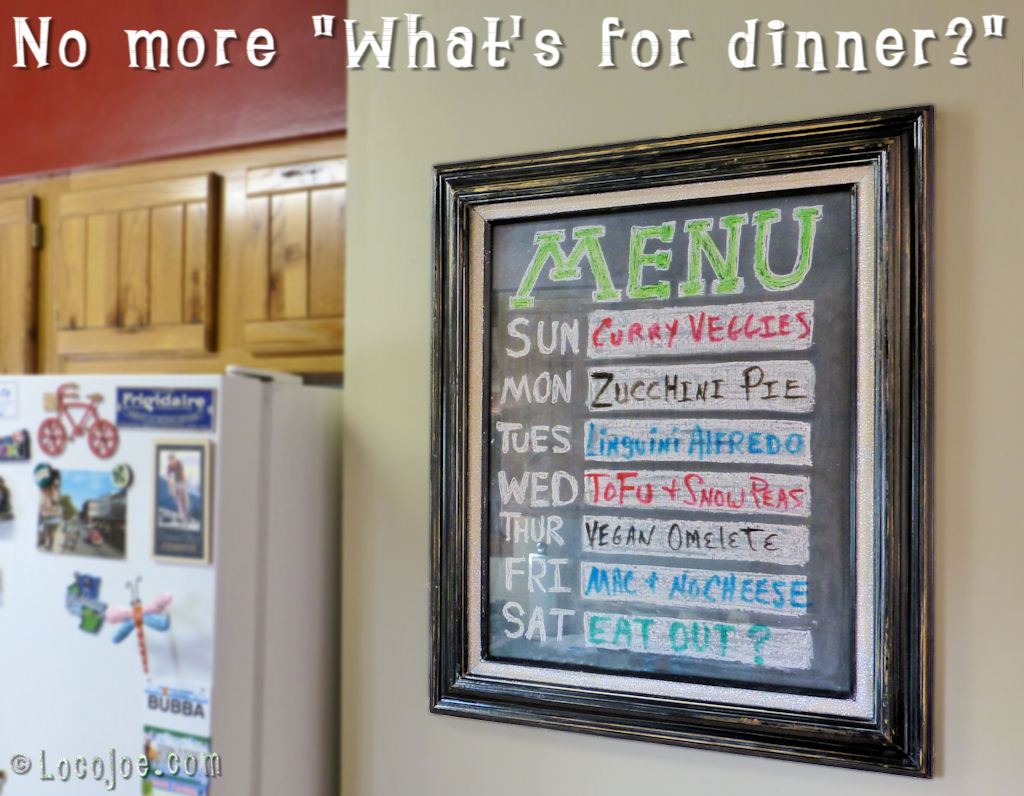
Dry Erase – Chalk Board Menu Sign

Since we’ve changed our eating habits our meals are more planned out in advance where as before they rarely were. This means now there has been a piece of paper magneted to the fridge that had the weeks dinner menu on it. I thought it would be nice to do something different than this and the first thing that came to mind was a chalkboard. I didn’t like the idea of the chalk dust floating around in the kitchen so my next thought was a dry-erase board but I don’t really like the looks of those white boards. Then I had what I thought was a great original idea… what about combining the two? Well a Google search comfirms there’s no such thing as an original idea and landed me here. Wow! that is cool. And even though I knew mine wouldn’t turn out near as nice I went for it anyway.

I made the thrift store rounds in search of a frame. The first thing I found was the chalkboard for .99. Another thrift store I found the frame I liked but it had no glass. Fortunately though the same store had another frame the same size with glass. I think each frame was around $4.

The chalkboard didn’t work all that well so I gave it a coat of chalkboard paint I had on hand.
My intent was to paint the frame another color but instead I decided to keep it original and just add to the existing patina/distress. I sanded to distress it further and then gave it a clear coat. I wrote in white chalk on the chalkboard and then placed it in the frame behind the glass. I can now write the weeks dinner menu in dry-erase marker on the glass. Maybe some day I’ll make an attempt to do better chalk writing.

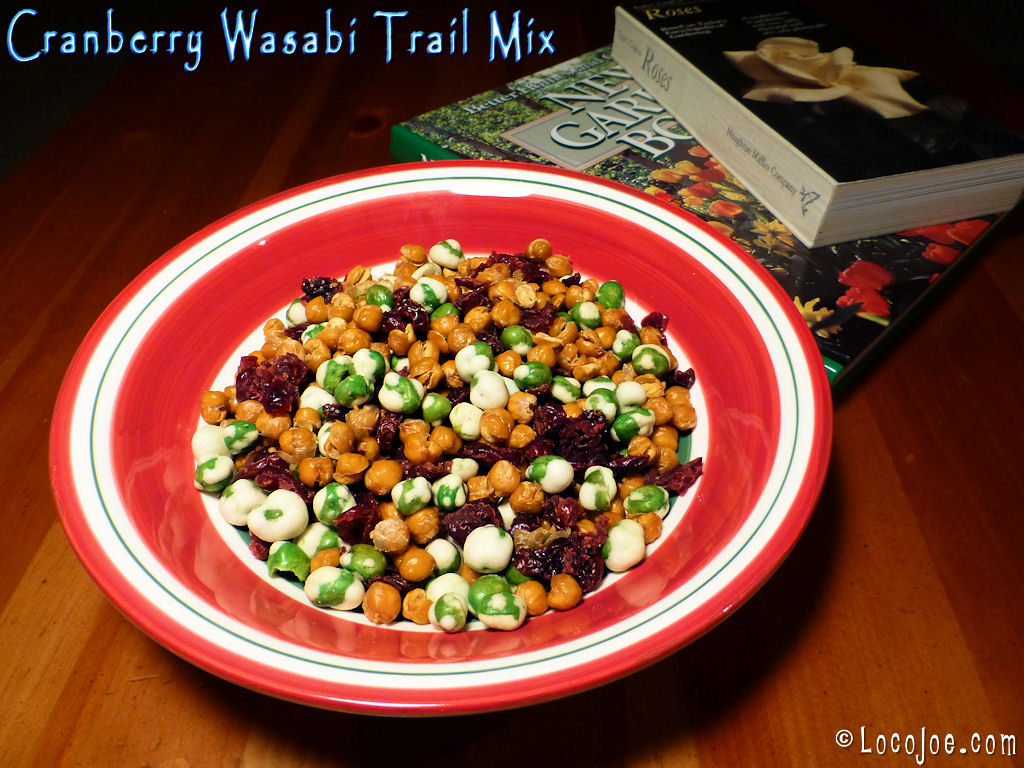
Cranberry Wasabi Trail Mix

Notes: This is really good. I added a little more cranberries and wasabi peas than what’s listed. The only other thing I’d do different is make a double batch :-)

Ingredients:
15 ounces chickpeas, drained and rinsed
⅓ cup dried cranberries
⅓ cup wasabi peas

Directions:
Preheat oven to 300 F. Line a cookie sheet with parchment paper and set aside. Drain and rinse chickpeas, patting dry with a clean cloth to remove excess moisture. Transfer chickpeas to baking sheet, arranging them in a single-layer. Spray with cooking spray, shake tray so chickpeas turn over and spray again. Repeat as necessary until all the chickpeas are well coated. Baked 40-60 minutes, until chickpeas are a deep golden and crunchy. After 25 minutes of baking, generously sprinkle with fine sea salt, shake chickpeas and sprinkle again. Continue to bake. Once baked allow to cool then mix with wasabi peas and dried cranberries as desired.

Source: The Happy Herbivore Cookbook